This photo album shows the progress of RV-12 completion: over one year 53 have been completed and the rate is now almost one per week:
RV-12 flying
Tuesday, September 28, 2010
Saturday, September 25, 2010
Something to savor
While I am laboring on the deburring of the tail cone skins, I enjoyed the following article and movie about the RV-12:
http://www.aopa.org/members/files/pilot/2010/october/feature_rv12.html
... but I will have to wait to fully savor, oh well...
http://www.aopa.org/members/files/pilot/2010/october/feature_rv12.html
... but I will have to wait to fully savor, oh well...
Tuesday, September 21, 2010
Section 9 - Stabilator Completed
Here is the finished product:

The rod sticking out is the counterbalance arm with its weights resting on the chair. Missing are the two anti-servo tabs that were built previously but not installed yet at this stage.
Surprisingly and notwithstanding the complexity of this component, I faced little challenges and had to drill-out just a few pop rivets (no solid rivets, thank God!). I think that there is a step missing in the instructions somewhere, although I may be wrong. I summarized this issue in the following picture which shows the instruction page with my notes:


 If anyone who has been through the stabilator has a comment about this missed hole, I would love to here from you in the comment section below.

The rod sticking out is the counterbalance arm with its weights resting on the chair. Missing are the two anti-servo tabs that were built previously but not installed yet at this stage.
Surprisingly and notwithstanding the complexity of this component, I faced little challenges and had to drill-out just a few pop rivets (no solid rivets, thank God!). I think that there is a step missing in the instructions somewhere, although I may be wrong. I summarized this issue in the following picture which shows the instruction page with my notes:


Friday, September 17, 2010
Page 09-08 : Stabilator Skinned!
Another good run with the pneumatic rivet puller. Blessed be VAN's for their choice of pulled rivets for the RV-12!
Stabilator clecoed & half skinned:

Stabilator fully skinned ... and 520 rivets (2 hours) later:

This is called a "Stabilator Assembly" because a few pieces are still missing (no anti-servo tabs).
The few clecos that are still visible correspond to holes that will be riveted later: caution if you are an artist riveter, mark these holes carefully lest you fill them unwittingly.
Wednesday, September 8, 2010
Page 09-06 : Stabilator Skeleton Assembly completed!
This is the largest assembly completed so far:

The nice thing is that all ribs are fastened to the Spar Box Assembly with Pop rivets, however most of these rivets are close enough to ribs flanges to require the use of the wedges that were manufactured in page 06-02. If you do not use these wedges, the rivets may not set properly and will have to be drilled out. Luckily, this did not happen this time.

The nice thing is that all ribs are fastened to the Spar Box Assembly with Pop rivets, however most of these rivets are close enough to ribs flanges to require the use of the wedges that were manufactured in page 06-02. If you do not use these wedges, the rivets may not set properly and will have to be drilled out. Luckily, this did not happen this time.
Notched Ribs Saga
I got quite an interesting debate on VAF Forum on the subject.
Here is the link to this debate: RV-12 VAF Forum
My conclusion is that I have to trust VAN's on the safety issue or else there is no point continuing to build my RV-12. However VAN's is playing with its reputation by delivering parts that have been repaired and therefore are "second grade" as a fellow builder said.
Sunday, September 5, 2010
It's Sunday: What would the Wright Brothers do?
When they left for the outer banks, they promised their father, Bishop Milton Wright, that they would never break the Sabbath by working. On Sunday December 13 1903, hard pressed by time to complete their 1903 tests and go home and just a few days before their now famous December 17 first flight, they spent most of their day inside their shed reading...
Saturday, September 4, 2010
Page 09-06 : Something fishy with HS1204 ribs
I found several notches in the big holes carved in the ribs to make them lighter. These notches are not mentioned or shown on the drawings and seem to serve no purpose. Here is a couple of examples:


Page 09-06 : Mea Culpa!
I did exactly what I recommended other builders not to do: I did not read the instructions with enough attention and made a mistake that costs me 12 rivets drill out! How humbling...
I will elaborate later
I will elaborate later
Thursday, September 2, 2010
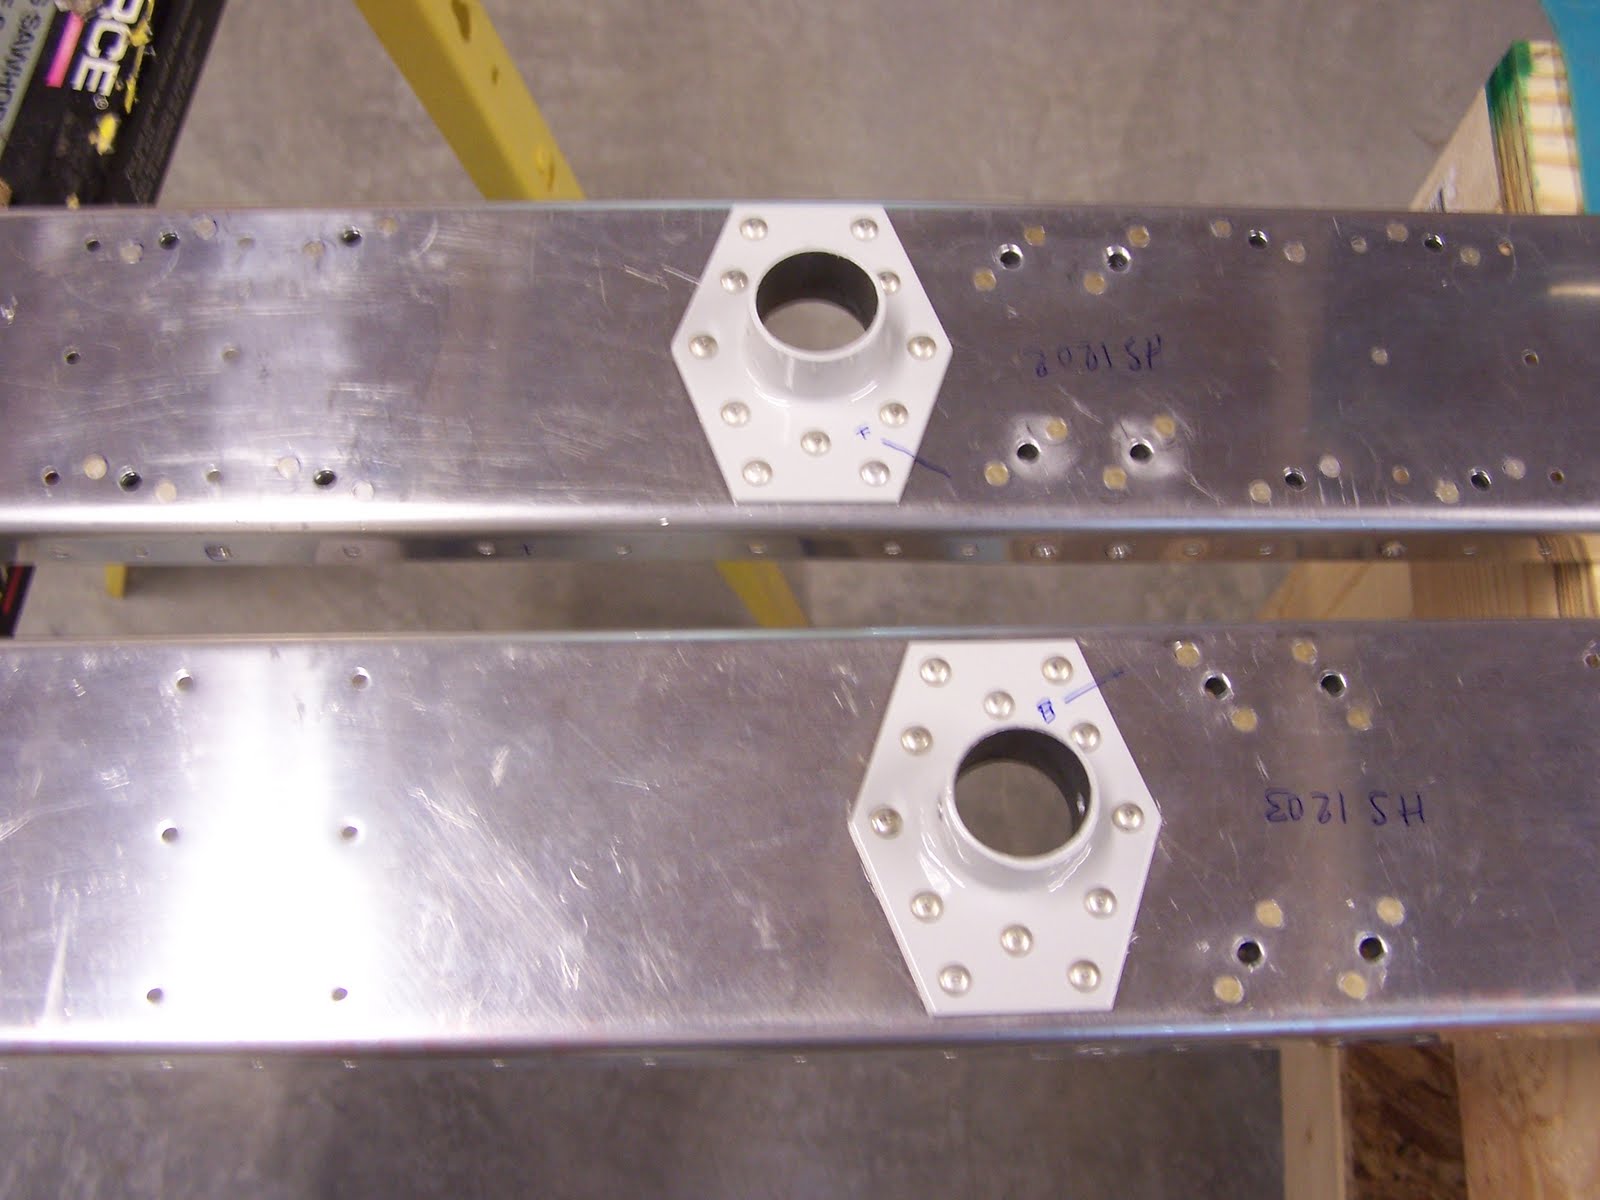
Stabilator: An Orgy of Squeezed Rivets!
To make my points, there are 56 squeezed rivets on the picture and it's only a small part of the stabilator:

Some are barely visible because they are countersunk but the biggies around the two big holes of the counterbalance brackets are AN470-AD4, they are arm and wrist killers... unless you use my improved Avery Hand Squeezer.
Besides the riveting, this is the first really complex component I have been building. It takes a while to gather all parts from the inventory. Although my inventory is well organized, the original packaging in sub-kits by VAN is not intended at regrouping the parts belonging to a specific component and you have to fish from several sub-kits packages. It may take a while to dig out a component buried deep and without the check of the inventory a delivery time strongly encouraged by VAN, you would be sometimes tempted to deem a component missing but you know it's here as you did not find anything missing in the inventory.
So far I have been through Page 09-01 to 09-04 without major issues. As much as instructions are held to a minimum by VAN, I am in haw by the accuracy and level of details provided in the drawings. You better watch carefully these drawings because some little details are the key to avoiding costly mistakes. Even if VAN designers cleverly key some components to prevent mistakes (i.e. some holes are a bit offset and will not match if your part is presented upside down or flipped 180deg) it is still possible to mis-position parts that have symmetrical shapes like the Spar Box Assembly.
I would recommend novice builders (I am one too) to:
- Go slow in this section, check and recheck your work against drawings
- As usual VAN instructions are short and every word is important: read slowly and make sure you understand because if you don't you are on your way to disappointment later
- In doubt, go to other builder's web sites/Blogs and research the RV-12 - VAF Forum
If nothing worked, ask the RV-12 VAF Forum a question and in the rare case you are not satisfied by the answers you still can call VAN's support.
At this point in the build, I have not called VAN's yet (although I was tempted a few times and later found that I would have looked a fool if I had done it!)
Subscribe to:
Posts (Atom)