Monday, June 25, 2012

A Leak Proof Gas Tank

Looks just like that:

After being 12 hours under light pressure, the balloon is still inflated.
Good to go! I just saved a few $$$ by building it rather than having it built by Vans plus, as Noel Falwell said, I know what's wrong in it, they are my mistakes, not anybody else's!
Thanks Terry for helping!

Thursday, June 21, 2012

Tuesday, June 19, 2012

A Badly Needed progress Report

I agree, I'm bad, I failed to report my recent activity on my RV-12 project. Let's condense the last month events in this report.
The Canopy, including the fiber glass skirt is finished and in storage in my basement and here is the proof:


Next I worked on completing the hydraulic brakes connections, as I had to work under the fuselage, I got a nice crawler to be comfortable:

I received at last my avionic kit, including the retrofit of the wings electrical connections and a few other goodies in addition to the main course the Dynon Skyview. Here is my workshop's shelves filled with this last kit before the final engine kit:
You can see on the bottom shelf my gas tank waiting for the second leak test, the first one having detected a leak through one rivet's shank hole. After consultation with fellow EAA1114 and EAA Tech Counselor Terry Gardner, I was able to make a repair by putting the tank under depression (using my shop vacuum cleaner) and having some diluted proseal sucked in. I just let the proseal cure before testing again.

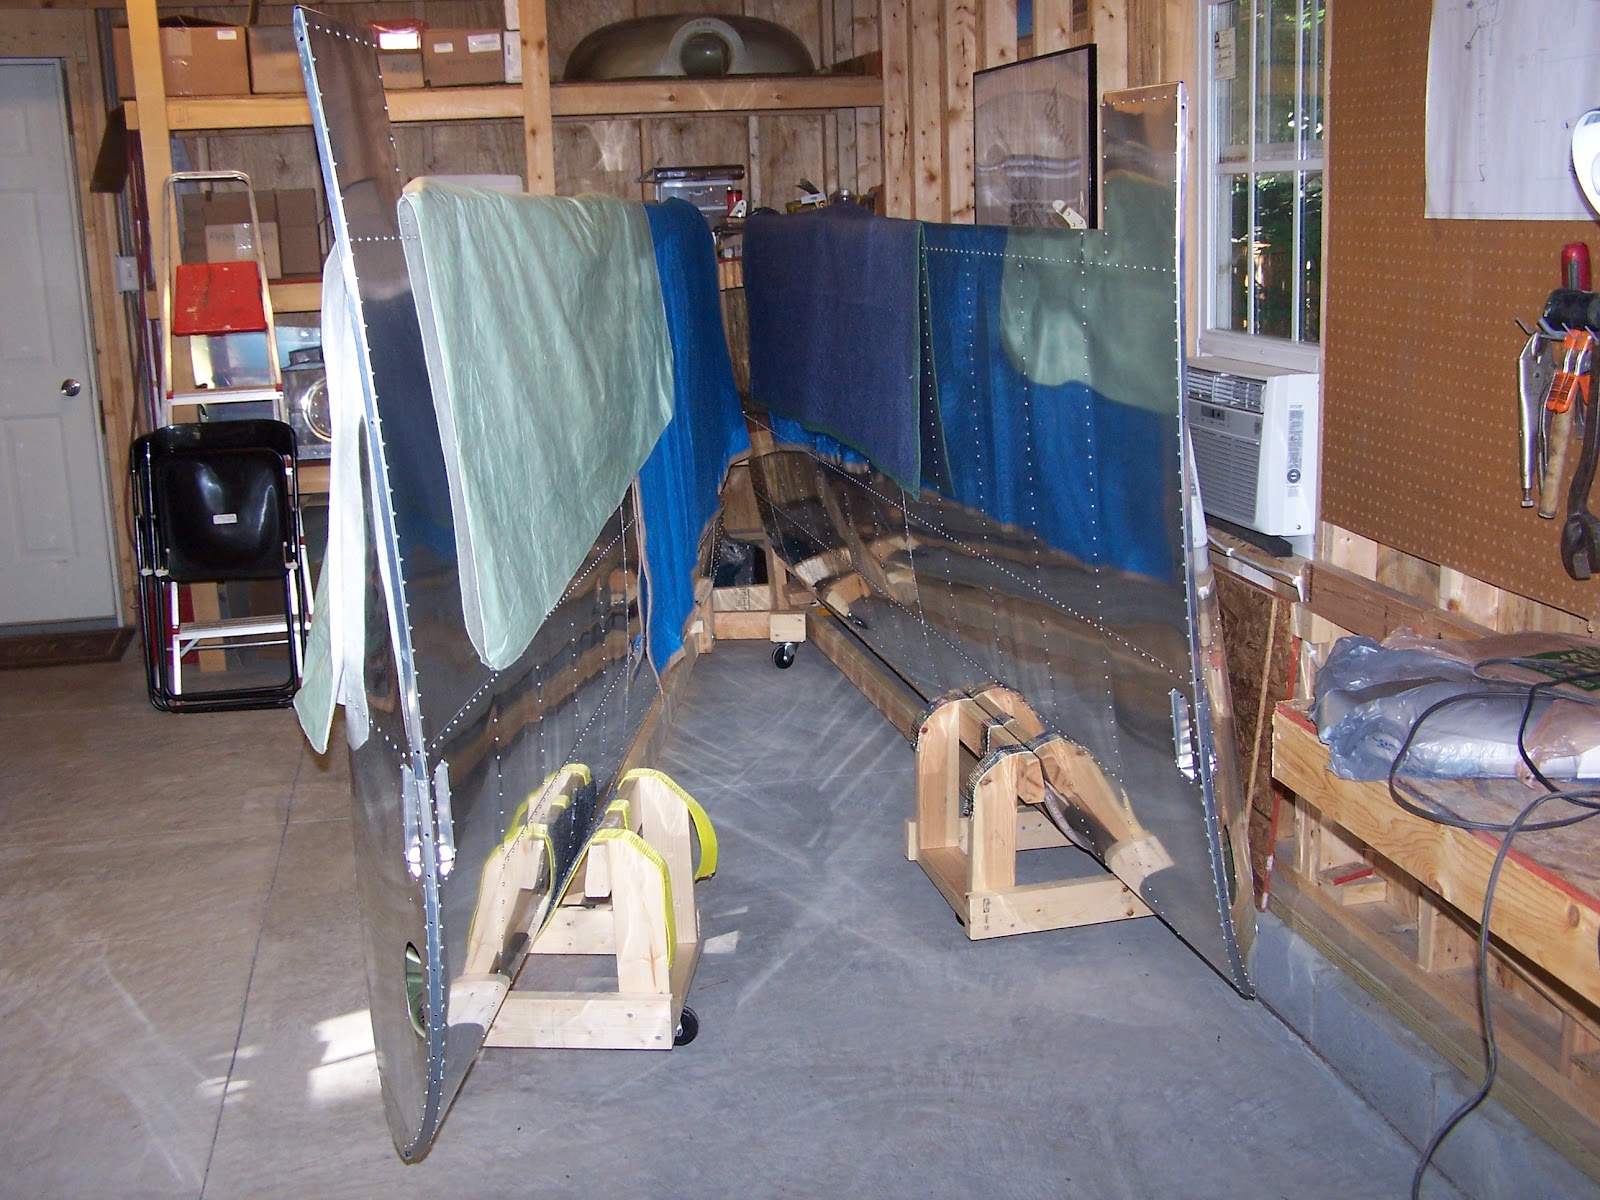
As the first steps in the avionics kit consists in retrofitting the nav lights with the strobe, I had to work on both wing. This was an opportunity to build a second "super rack" to accommodate the right wing which was still stored in my basement. I built the left wing super rack a couple of months ago to facilitate a one man operation when removing/installing the wings see: http://vieilleburette.blogspot.com/2012/03/rv-12-super-rack-more-demos.html
Now the two wings and the fuselage are neatly coexisting in my workshop:

Here are the two wing racks side by side, each on wheels allowing easy movement.
Here is the shop full with the two wings on the right, against the wall:
In the last few days, my daughter Anne came to help me start the Avionics kit. We started with the Wing's new connectors and the light strobe. We are working on one wing at a time while the other wing and the fuselage are wheeled out of the workshop on the driveway:

Here is the famous new wing connector once in place:


Thursday, June 7, 2012

Two Years Already!

Time flies but not my plane, yet!
As the 2 year anniversary of the start of my RV-12 project nears, it may be a good time to provide an update to my fellows blog readers. Two years ago, I was not only a green plane builder, I also had to learn to fly, two big milestones on my bucket list. I got my Sport Pilot license just a year ago but I'm not done yet with the build although it does not bother me at all. It has been a great experience, discovering the fellowship within the builders/Flyers community, including EAA Chapter 1114 and I dread a little that it will end too soon.
Here is where I stand more in details:
I just received the Avionics Kit ( Dynon Skyview, Auto Pilot) plus a number of upgrades recently released by VANs like the new more reliable electric plugs for the wings. I have only one kit left to order: the Rotax engine (ouch! says my wallet). At this point I expect to spend the coming summer in my backyard workshop (a convenient commute of 30 seconds from my home). Comes Fall, I will have to move to an airport hangar for the final steps before the first flight (who knows, it could even take place on December 17th!). After the testing phase (just 5 hours for E-LSA) , I expect to do trips between Raleigh and Jefferson which will cut my commuting in half. Of course taking into account pre and post flight plus the commute to/from the airports it will be a wash at best compared to driving but much more fun!

Wednesday, May 9, 2012

Canopy Fiber Trimming continued

After investigating a few builder's sites, I conclude that there is no standard way to trim the fiber arm regarding the covering of the cavity behind the pivot bolt. Here are a few examples of trimmings:


Conclusion: you are on your own, do your best to make it look good and clear of interference.

Friday, May 4, 2012

What about an electric powered RV-12?

Dick Van Grunsven must have already mulled this idea...
I believe the RV-12 is a good platform for it: lots of room for batteries in the tank and firewall forward areas once you get rid of the Rotax. Plus at $27K for the engine, you can buy lots of batteries with the money left after buying a $5K electric motor.

Major firms join electric aircraft discussion

Wednesday, May 2, 2012

A bad start after a nice vacation break!

Returning from a nice Spring break in Hawaii, I got back to my canopy fiber work, sanding and filling and sanding etc... Then came the trimming time and here is the result:

Left side looks fine, the cavity behind the front arm is well closed:


Right side is bungled, there is a gap, oh nooooo! :


Warning for other builders: my mistake was to trust the trimming template provided by VANs. Not that there is anything wrong with it (as Seinfeld would say) but you have to be careful in the positioning of the template. I was off 1/8 of an inch vertical and horizontal. I will need help to make the repair (as I did for the initial fiber layout) but it's doable as fiber is easy to repair... with time and patience.
I believe that VANs is a bit light on instructions concerning fiber work and they could have warned about this potential pitfall.