
Wednesday, December 29, 2010
Inspection time
Before closing the skins on my left wing, I got the visit of EAA technical counselor Terry Gardner from EAA chapter 1114.
 The inspection was positive: nothing to rework, workmanship all OK which is gratifying for a first time builder. Terry who is building an RV9 was impressed by the ease and speed of building allowed by the pulled rivets which are the fasteners of choice for the skins of the RV-12. The visit reports are filed with EAA and can be used as reference when an amateur built plane is sold. Being an EAA member has its privileges!
Monday, December 27, 2010
Featuring Bernard Paul, French pilot and flight club manager
Bernard is a former collègue from Alcatel and a good friend. He is managing the Flight Club in Lannion, France and on the picture below he just took delivery of a brand new plane called APM 30 Lion from Issoire Aviation, a French GA plane builder. This is a VLA (very light airplane) the European equivalent to the US LSA standard (albeit with a max take-off weight of 1654 pounds, allowing the Lion to be a 3 seater).

In July 2007 Bernard took me and my family on a flight over the picturesque Cotes d'Armor in Brittany. This event definitely influenced my decision to go into flying in my retirement years. The plane we used, in the background, is a 4 seater Robin DR-400, also a French made airplane.


In July 2007 Bernard took me and my family on a flight over the picturesque Cotes d'Armor in Brittany. This event definitely influenced my decision to go into flying in my retirement years. The plane we used, in the background, is a 4 seater Robin DR-400, also a French made airplane.

Sunday, December 26, 2010
White Christmas, kind of...
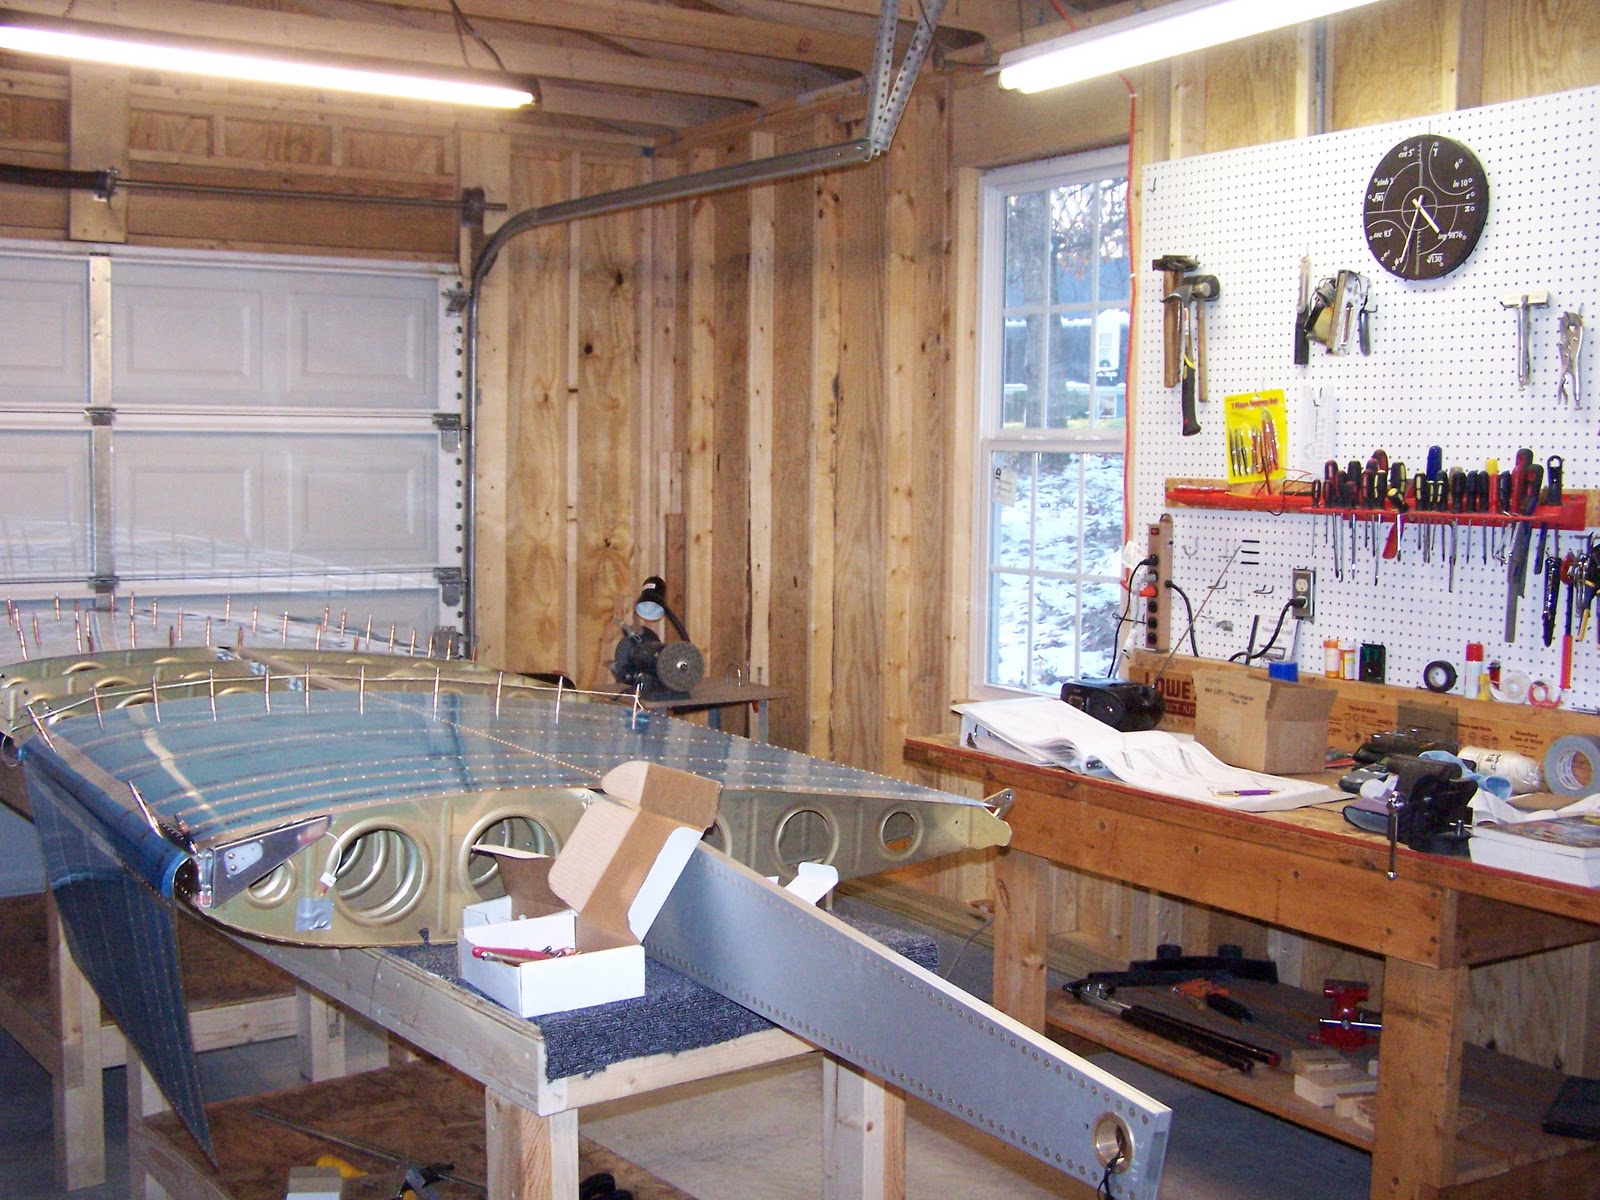
This is how my workshop looks the day after Christmas:
 With temperatures in the lower twenties, work on the wings is almost frozen in its tracks
 Is it rational to work in these conditions?

No, it is not, this is why I have an irrational clock in my workshop, a Christmas gift from my dear wife Michèle (may be a subtle message too?):
 It gives the irrational time spent on irrational activities.
Note that the numbers are at the right place on the dial. For example log 9876 = 3.995 which translates: 3 hours 59 minutes and 42 seconds.
For more on irrational numbers: http://en.wikipedia.org/wiki/Irrational_number


No, it is not, this is why I have an irrational clock in my workshop, a Christmas gift from my dear wife Michèle (may be a subtle message too?):

Note that the numbers are at the right place on the dial. For example log 9876 = 3.995 which translates: 3 hours 59 minutes and 42 seconds.
For more on irrational numbers: http://en.wikipedia.org/wiki/Irrational_number
Wednesday, December 15, 2010
Visit of Denny Smith's RV-12 in Carthage, NC
Kent Misegade, our EAA 1114 chapter president, kindly introduced me to the owner of the first flying RV-12 in the Raleigh region. Denny Smith and partner George Neal built Kit # 120352 in about 9 months, probably a record. They had their first flight December 10 at their field, Gilliam Mc Connell in Carthage, NC. They reported both being thrilled how well the airplane performs and handles. Kent and I had an interesting and rather thorough discussion with Denny, our host about the challenges (there are few) and satisfactions (there are many and more to come) brought by this project. I liked the finish of the interior with carpet, side panels and arm rests that look very professionally made. Denny gave me a couple of useful hints about working on the fuselage: delay riveting the back window to allow access in the baggage compartment which also holds the (should I say infamous?) gas tank. He actually had no problem building the tank but deems the sight glass window (the source of most leaks) not that usable. He also delayed riveting the tailcone to the fuselage until he had to adjust the connections to the empennage, allowing better access to the rear of the fuselage until all work on the fuselage was completed. Here are a few pictures taken by Kent:
N33SN fresh from its maiden flight:

Denny Smith, happy builder:

JP, envious builder:


Trying to make airplane noise :

A neat interior:

Denny and Kent trying to stay warm:

N33SN fresh from its maiden flight:

Denny Smith, happy builder:

JP, envious builder:


Trying to make airplane noise :

A neat interior:

Denny and Kent trying to stay warm:

Saturday, December 11, 2010
First Flight for Hervé Savary's RV7A
Hervé Savary is a French Pilot/Builder on a temporary assignment in Greenville, SC. Hervé was building an RV7A in his workshop in Compiègne, France when this assignment came-up. The rest of the story is documented on his builder's site:
http://www.projet-construction-rv7a.fr/default.htm
I got the opportunity to know Hervé through George Orndorff from GeoBeck to whom Hervé wisely contracted the finishing of his plane while he was on assignment. I found about that while I was taking a Sheet Metal course at George's workshop in Gold Hill, NC. last May.
Hervé kindly documented the event through the following videos:
Le départ / Departure
Le décollage des deux avions / Take off of both planes
L'atterrissage du chase plane, je suis a bord . Landing of chase plane, I am onboard
Passage basse hauteur de N36HS / Low pass N36HS
De retour au sol après 40 minutes de vol / Back on the floor after 40 minutes flight
Tuesday, November 30, 2010
Progress Report on Wings
Sorry, I have let this Blog down during the Thanksgiving period although I continued to work on the wings. The Deburring and Fluting of the Ribs was quite time consuming and when all the parts were ready I took them to the Alodine treatment in Greensboro. I took also all the spars except the main wing spars which are already anodized for corrosion protection.
Here are the ribs all ready for alodine:

Back all alodined on the shelf, ready for wing skeleton assembly:
 Let's start the fun! First the main ribs of the left wing:
One down, 12 to go!
 Left wing main ribs done!
 And on and on...
Here I am done with the left wing that I had to hang to make room for the right wing:
 At this point I am preparing to put the nose ribs on the right wing and the "gotcha" strikes.
When looking for the different nose ribs, I was missing a "forward trimmed" nose rib but I had an extra nose rib which was not forward trimmed: Houston, we have a problem!
As I knew I had trimmed the right number of ribs, I knew that my trimmed rib was somewhere and the only placed would be... on the left wing (hanging on the left) at the wrong place.
I found it there:
 I am already working at drilling out the 6 rivets. Note that the room is limited between the ribs it's why rather than using a drill I am using a small electric screwdriver with a #30 drill. The good news: unriveting went swell.
Note for the builders: there is little difference between a forward trimmed rib and a non trimmed one; this is why I caught this error late. Luckily, I had not skinned the left wing before working on the right wing, following the order of the instruction book. At some point I considered skinning the left wing first because of the lack of space in my workshop, this would have been big trouble!
Then finishing the right wing skeleton was a cinch:
 This is where I stand today, the last day of November 2010.
I just ordered the fuselage kit which should arrive in 8 weeks which put the delivery end of January. This means I have plenty of time to finish the wings (and find out "where in the world am I going to store them to make room in my workshop". Note: vertical stab and stabilator are already using a guest bedroom).
Brief count down:
Fuselage 2 months: end of March
Finishing kit 2 months: end of May
Avionics 2 months: end of July
Engine 2 months: end of September
Preparing for first flight 1 month: end of October
First flight: sometime in November/December 2011
Here are the ribs all ready for alodine:

Back all alodined on the shelf, ready for wing skeleton assembly:

One down, 12 to go!


Here I am done with the left wing that I had to hang to make room for the right wing:

When looking for the different nose ribs, I was missing a "forward trimmed" nose rib but I had an extra nose rib which was not forward trimmed: Houston, we have a problem!
As I knew I had trimmed the right number of ribs, I knew that my trimmed rib was somewhere and the only placed would be... on the left wing (hanging on the left) at the wrong place.
I found it there:

Note for the builders: there is little difference between a forward trimmed rib and a non trimmed one; this is why I caught this error late. Luckily, I had not skinned the left wing before working on the right wing, following the order of the instruction book. At some point I considered skinning the left wing first because of the lack of space in my workshop, this would have been big trouble!
Then finishing the right wing skeleton was a cinch:

I just ordered the fuselage kit which should arrive in 8 weeks which put the delivery end of January. This means I have plenty of time to finish the wings (and find out "where in the world am I going to store them to make room in my workshop". Note: vertical stab and stabilator are already using a guest bedroom).
Brief count down:
Fuselage 2 months: end of March
Finishing kit 2 months: end of May
Avionics 2 months: end of July
Engine 2 months: end of September
Preparing for first flight 1 month: end of October
First flight: sometime in November/December 2011
Sunday, November 14, 2010
EAA 1114 Visit of the GE Turbine Engines Plant
Shu Fung, from GE and an EAA chapter 1114 member organized today a special visit of the GE plant located in RTP on Miami Boulevard. There were about 25 members, all very interested and a few quite competent about jet engines. The best part of the visit is that Shu who is working at the plant is passionate about the jet engine business and managed to communicate his passion to an already very motivated group. The result: a visit planned for 1 hour and a half lasted close to 4 hours! We even saw the engine Alliance GP7000 that equips the A380, that is, the one that does not blow-up in flight...
A few things we learned about modern jet engines:
- The blades of the first stage compressor move to change their angle of attack in order to fight stall, not unlike the wing of an aircraft. This is of course computer controlled as a stall of the compressor would result in a flame out and a few other bad things for the engine longevity.
- The blades and enclosures of the turbines behind the combustion chamber are cooled by air ducked from the compressor chambers.
- The engine starter is not mechanically linked to the turbine shaft, it is just a compressor that pushes air into the combustion chamber to get the blades moving until the ignition and combustion of fuel takes over
Now next time we fly an airliner, we will know what's behind these big cowlings. Whether this will make us more comfortable flying is another story... Did you say A380?
I like my Rotax 912S.
Subscribe to:
Posts (Atom)